Index
Classes with this recipe
Index
Anyone who is coeliac knows how this usually goes: gluten-free pizza is either a thin disc that tastes of cardboard, or rubbery underneath and burnt on top. It is not the flour's fault, it is the method's. A gluten-free dough behaves differently from a wheat one, and has to be handled differently: more water, no long kneading, two rises and a bake in two stages.
This is the pizza we make in the gluten-free class at Piazza Margana 22, with Fioreglut flour from Antico Molino Caputo. For four pizzas: 1 kg of flour, 800 g of warm water, 15 g of dry yeast, 60 g of extra virgin olive oil and 30 g of salt. Nothing else. Below is the method step by step, and why the yeast is activated separately, why the dough is divided into four bowls straight away and why it goes into the oven twice.
Gluten-free pizza ingredients for 4 pizzas
For four pizzas you need a kilo of flour, 800 g of water and little else.
- 1 kg of Caputo Fioreglut gluten-free flour, 250 g per pizza
- 800 g of warm water, 200 g per pizza
- 15 g of dry yeast, or 30 g of fresh yeast
- 60 g of extra virgin olive oil, four tablespoons
- 30 g of fine salt
- rice flour for the tray, the lightest dusting
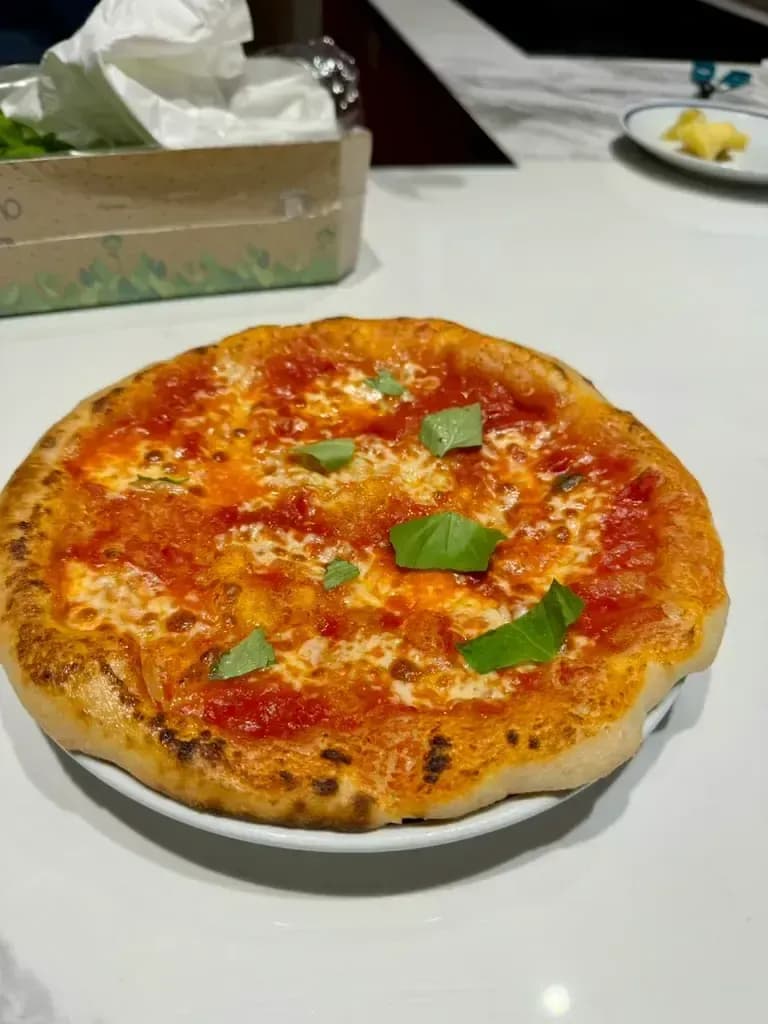
For the margherita: 400 g of peeled tomatoes crushed by hand, 400 g of fior di latte cut into strips and drained, 8 basil leaves. The same batch also makes three rectangular trays instead of four round pizzas: the only thing that changes is how you divide it.
Why Fioreglut, and why 800 g of water
Antico Molino Caputo's Fioreglut is a gluten-free blend made for leavened doughs, and among the starches and fibres it also contains dextrose, which is sugar. Two practical consequences: the dough rises fast and rises a lot, which is why it is better divided into bowls before it grows rather than left in one mass; and it has no aftertaste, the flaw that makes a gluten-free pizza recognisable at the first bite.
Water is the other difference. Gluten-free blends absorb far more than wheat flour: 800 g per kilo, 80 percent, against the 380 g for 600 g of flour in our wheat pizza. A dough this wet looks wrong the first few times, and is in fact the point: without gluten, water is what keeps the base soft, and a drier dough bakes hard.
The yeast is activated separately, and you can see if it is alive
The first move is a small bowl: about 100 g of the warm water, the 15 g of dry yeast in it, stir and wait a few minutes. If bubbles form on the surface, the yeast is active and you can start. If nothing happens, the yeast is old or the water was too hot, and the dough will never rise: better to find that out now, in a small bowl, than two hours later in front of four bowls that have not moved.
It is a step often skipped in wheat pizza, because gluten forgives and time fixes things. Not here: without a gluten network holding the gas, the rise is the only thing giving the base its structure.
The dough: liquids first, then flour and salt
The liquid ingredients go into the mixer first: the rest of the warm water, the activated yeast and the 60 g of oil. Then the flour and the salt. Knead until the dough is compact and not too sticky, and stop there.
Do not look for the smooth, taut ball of a wheat pizza: it will not come. There is no windowpane test, nothing to develop with fifteen minutes of work, because the gluten that work builds does not exist here. The dough stays soft and slightly sticky: that is correct. Without a stand mixer, a sturdy spoon and one hand are enough, because the job is mixing, not kneading.
Four oiled bowls, two hours in the switched-off oven
Here comes the tip that saves the day: divide the dough straight away, into four pieces of about 470 g, and put them in four lightly oiled bowls. With dextrose the rise starts strongly, and dough left in a single bowl reaches the rim and climbs over it. Divided first, the balls are ready and there is nothing to handle again later.
Cover the bowls and put them in the oven switched off with the light on: that is the warm, steady, draught-free spot you need. At least two hours. One practical detail that always gets a laugh in class: covering plastic bowls with cling film is a fight, it will not stick and goes where it likes. A disposable shower cap, with its elastic, stays put, washes and can be reused.
Spreading in the tray, with rice flour
Gluten-free pizza is spread in the tray, not on the counter and then moved: the dough does not hold together well enough to be lifted. Line the tray with baking paper and the lightest dusting of rice flour, which keeps the dough from sticking while you spread it. Not wheat flour, obviously, and not semolina either.
You spread it by hand, from the centre outwards, pressing with your fingertips. If the dough clings to your fingers, oil them lightly and carry on. No rolling pin: a gluten-free dough is pushed, not pulled, and the pin would also crush the air the rim needs.
Then the second rise: the trays go back into the oven switched off with the light on for about half an hour. This is where the base takes air back after being pressed flat, and it is the step that separates a pizza with a rim from a flatbread.
The double bake: tomato first, mozzarella after
After that half hour, take the trays out and heat the oven to 200 degrees. Spread the hand-crushed tomato with a pinch of salt and bake for about ten minutes, with the tomato alone on top.
This first bake is the step that makes the difference. A dough this hydrated, put in the oven with all the toppings on, stays damp underneath while the mozzarella dries out and goes past its point: ten minutes with tomato alone dry and set the base. Then the tray comes out, you top it as you like, the drained fior di latte first, and it goes back until the mozzarella has melted.
On the way out, the basil leaves and a drizzle of raw oil. Basil that goes into the oven turns black and bitter, and that is not what you want on a pizza.
The mistakes we see in class
Kneading for a long time, looking for the network. There is none. Mix until compact and move on to the rise.
Leaving the dough in one bowl. With dextrose it grows a lot and climbs over the rim. Four oiled bowls, straight away.
Skipping the second rise. Half an hour after spreading feels like wasted time, and it is what gives the rim. Without it the base bakes flat.
Baking everything at once. With all the toppings on, the base stays raw in the middle. Tomato first, ten minutes, then the rest.
The wrong flour on the tray. Rice flour, not wheat, and not semolina: for a coeliac, one dusting of wheat flour cancels all the work.
Contamination: what matters as much as the flour
A gluten-free dough is only safe if everything that touches it is too. Wheat flour flies and stays in the air for hours: a floured counter next door, or a tray used the evening before, is enough to contaminate a pizza made with the right flour.
In class the gluten-free station is separate: mixer, bowls, trays, spatulas and surface clean and dedicated, dusting only with rice flour, its own tray in the oven, and no wheat dough being worked alongside at the same time. At home the same principle applies: if there is also wheat pasta or bread in the kitchen, make the gluten-free pizza first, on a freshly cleaned surface, and keep the two flours in two different places.
Where to learn gluten-free pizza in Rome
In our kitchen at Piazza Margana 22, in the centre of Rome, a short walk from Piazza Venezia. In the gluten-free pizza and gelato class everyone activates their own yeast, mixes, spreads in the tray and tops their own pizza with Fioreglut, at a dedicated station; while the pizzas rise you make pistachio and hazelnut gelato, which are naturally gluten-free: only the cone changes, for a gluten-free version.
There is also the gluten-free fresh pasta class, where the tonnarelli are rolled with Fioreglut and the class closes with tiramisù. Shared classes are taught in English; for Italian or Spanish, book a private session. The full list is on the cooking classes page.
Recipe details
Gluten-free pizza the way we make it in the gluten-free class at Piazza Margana 22, for four pizzas: 1 kg of Caputo Fioreglut gluten-free flour, 800 g of warm water, 15 g of dry yeast (or 30 g of fresh), 60 g of extra virgin olive oil and 30 g of salt. The yeast is activated separately in a little of the water, then the mixer takes the liquids first and the flour and salt after. The dough is divided straight away into four oiled bowls, because Fioreglut contains dextrose and rises a lot, and rests a couple of hours in the oven switched off with the light on. It is spread in the tray on baking paper with a dusting of rice flour, another half hour of rising, then the oven at 200 degrees: a first bake with tomato only, ten minutes, and the mozzarella finishes it.
Preparation
Activate the yeast
Pour about 100 g of the warm water into a small bowl and dissolve the 15 g of dry yeast (or 30 g of fresh) in it. Leave it a few minutes: when bubbles form on the surface the yeast is active. If nothing happens, the yeast is old or the water was too hot, and the dough will not rise.
Mix: liquids first, then flour and salt
Pour the liquid ingredients into the mixer first: the rest of the warm water, the activated yeast and the 60 g of oil. Then add 1 kg of Fioreglut and the 30 g of salt. Knead until the dough is compact and not too sticky: without gluten there is no network to build, and no windowpane test.
Divide straight away into four oiled bowls
Fioreglut contains dextrose, which is sugar, and the dough rises a lot. Divide it straight away into four pieces of about 470 g and put them into four lightly oiled bowls: that way the balls are ready and the dough will not climb out of the container while it rises.
A couple of hours in the oven switched off with the light on
Cover the bowls and put them in the oven switched off with the light on: that is the warm, draught-free spot you need. Let them rise for at least two hours. Covering plastic bowls with cling film is a fight: a disposable shower cap, with its elastic, stays put and can be reused.
Spread in the tray with baking paper and rice flour
Line the trays with baking paper and the lightest dusting of rice flour, which keeps the dough from sticking while you spread it. Spread each ball by hand, from the centre outwards; if it clings to your fingers, oil them lightly. No rolling pin.
Half an hour of second rise
Put the trays with the spread dough back into the oven switched off with the light on for about half an hour. This is the rise that gives the pizza its rim: skip it and the base bakes flat and dense.
First bake with tomato, 200 degrees
Take the trays out of the oven and heat it to 200 degrees. Spread the hand-crushed tomato over the dough with a pinch of salt and bake for about ten minutes: this is the first bake, the one that dries the base.
Top it and finish the bake
Take it out, top it as you like with the drained fior di latte and whatever else you want, and put it back until the mozzarella has melted. On the way out, the basil leaves and a drizzle of raw oil.
Why it bakes in two stages
The double bake is the difference between a good gluten-free pizza and a rubbery one. Fioreglut dough is very hydrated and has no gluten holding its structure: put in the oven with all the toppings on, the base stays damp while the mozzarella is already gone. Ten minutes with tomato only dries and sets the base; then the rest goes on and the bake finishes in the time the mozzarella needs to melt. The same logic applies to the two rises: two hours in the bowls and half an hour in the tray after spreading, because that is where the dough takes air back and builds the rim.
Fioreglut, dextrose and rice flour
Antico Molino Caputo's Fioreglut is a gluten-free blend for leavened doughs, and it contains dextrose: the sugar that gets the rise going quickly, which is why the dough doubles easily and is better divided into bowls before it grows. It absorbs a lot of water, 800 g per kilo against the 380 of our wheat pizza. For the tray you use rice flour, not wheat flour and not semolina either: its only job is to let the dough slide while you spread it. The 1 kg bag is sold in specialist shops and cash and carry stores.
Dedicated tools, and the gluten-free class
For coeliac guests gluten-free pizza is made at a dedicated station: mixer, bowls, trays and surface clean of any trace of wheat flour, dusting only with rice flour and its own tray in the oven. Wheat flour flies: a floured board next door is enough to contaminate a dough that is safe on its own. In the gluten-free pizza class everyone mixes, spreads and tops their own pizza with this flour, and the class closes with homemade pistachio and hazelnut gelato, naturally gluten-free: only the cone changes.
Ingredients
1 kg of Caputo Fioreglut gluten-free flour, 250 g per pizza
800 g of warm water, 200 g per pizza
15 g of dry yeast, or 30 g of fresh yeast
60 g of extra virgin olive oil, four tablespoons
30 g of fine salt
Rice flour for the tray, the lightest dusting
For the margherita: 400 g of peeled tomatoes crushed by hand, 400 g of fior di latte in strips and drained, 8 basil leaves
Method
- 1
The yeast is activated first. Pour about 100 g of the warm water into a small bowl and dissolve the dry yeast in it. After a few minutes the surface bubbles: the yeast is active and the dough can start.
- 2
Liquids first into the mixer. The rest of the water, the activated yeast and the oil; then the flour and the salt. Knead until the dough is compact and not too sticky.
- 3
Four oiled bowls, a couple of hours in the switched-off oven. Fioreglut contains dextrose and rises a lot: divide the dough straight away into four lightly oiled bowls, covered, so it does not climb out of the container. In the oven switched off with the light on, at least two hours.
- 4
Into the tray, and another half hour. Baking paper and the lightest dusting of rice flour, which keeps the dough from sticking while you spread it; if it clings to your hands, oil your fingers. Once spread, it goes back into the switched-off oven with the light on for half an hour.
- 5
Oven at 200 degrees, in two stages. Take the trays out, heat the oven to 200 degrees, spread the tomato and give it a first bake of about ten minutes. Then top it as you like and put it back until the mozzarella has melted.

Written by
Francesco Ieriti
Founder of Italian Cooking Classes in Rome and head chef, with more than 14 years in international hospitality. He writes the recipes on this blog the way they are taught in class at Piazza Margana 22: per person, mistakes included.